Last Updated: November 11, 2025 | Reading Time: 15 minutes
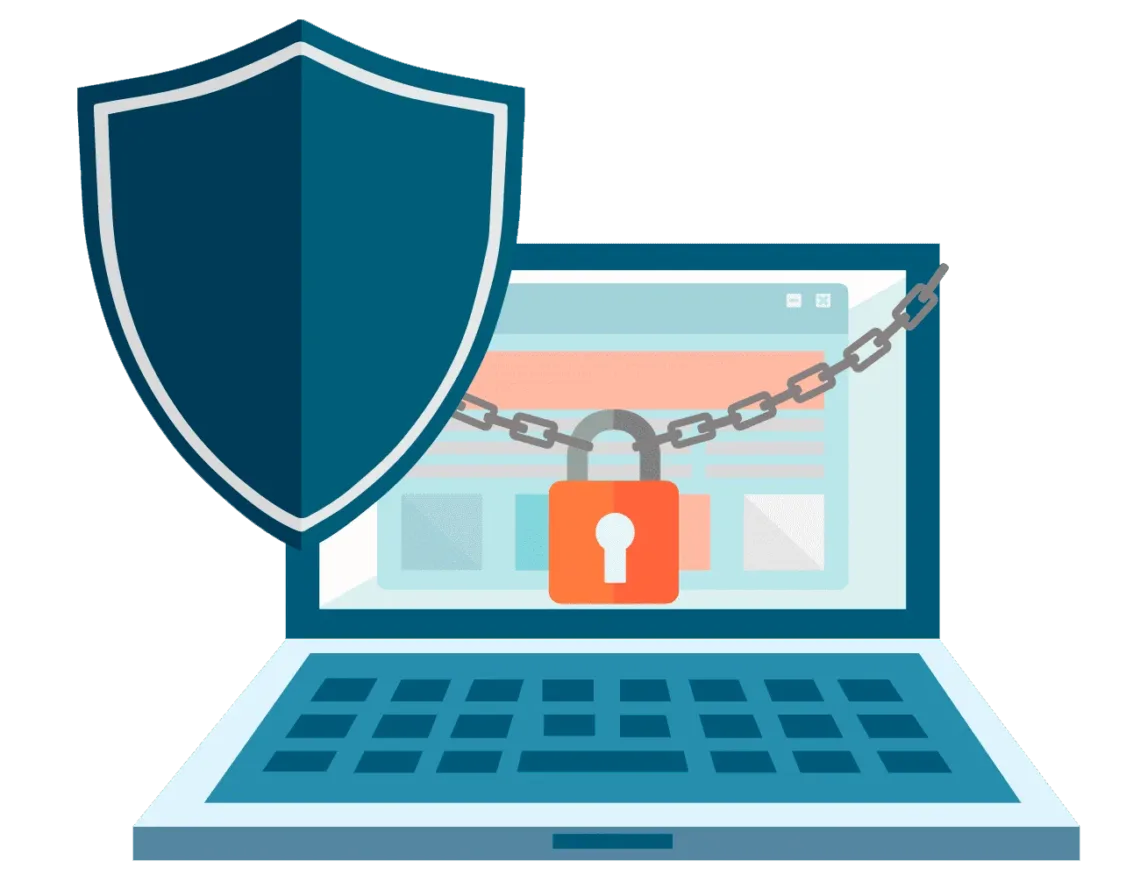
You’ve worked hard to build your blog and create quality content, but is your blog truly safe? The statistics are alarming: 96% of WordPress professionals have experienced at least one security incident, and 64% have suffered a full breach. Over 13,000 WordPress websites fall victim to hacking incidents daily.
If you haven’t properly secured your blog, everything could disappear in a single click. In this comprehensive guide, we’ll show you exactly how to uploadblog keep safe using 2025’s latest security measures and backup strategies.
Why Blog Security and Backup Matters in 2025?
Blogging isn’t just about writing content, it’s your digital asset, revenue stream, and brand identity. Here’s the reality:
The Threat Landscape
Hackers are now using AI to mass-scan WordPress sites and exploit vulnerabilities faster than ever. The numbers tell a sobering story:
- 6,700 new vulnerabilities were identified in the WordPress ecosystem in just the first six months of 2025, with 41% exploitable in real-life attacks
- Cross-site scripting (XSS) vulnerabilities account for approximately 50% of all plugin vulnerabilities
- 72% of WordPress sites have experienced at least one security breach
- 52% of attacks happen because of vulnerable plugins
- A WordPress site is attacked, on average, every 28 minutes
What’s at Stake?
Without proper security and backups:
- Years of content vanish in seconds
- SEO rankings plummet if Google blacklists your site
- Customer trust evaporates after a data breach
- Revenue loss from downtime (average cost: $5,600/minute for small businesses)
- It takes 292 days on average to detect and stop attacks involving stolen login credentials
The Good News
WordPress sites that consistently update their software components demonstrate a 42% lower likelihood of being compromised. With the right strategy, you can protect your blog effectively.
What’s New in WordPress Security 2025?
Before diving into implementation, here’s what changed this year:
1. AI-Powered Threat Detection
Hackers now use AI to rewrite attack payloads until they bypass security rules. The good news? Organizations using AI security tools save an average of $1.88 million per data breach.
Modern security plugins now include:
- Machine learning-based malware detection
- Behavioral analysis for anomaly detection
- Automated vulnerability patching
- Predictive threat intelligence
2. Enhanced Password Security
WordPress now implements bcrypt password hashing, providing stronger security than the previous MD5 system.
3. Automatic Rollback Features
New automatic rollback features protect sites if updates break functionality, reducing the fear of updating plugins and themes.
4. EU Cyber Resilience Act Impact
Starting September 2026, the European Union’s Cyber Resilience Act will mandate developers to disclose severe vulnerabilities, improving transparency across the ecosystem.
Core Security Measures: Essential Foundation
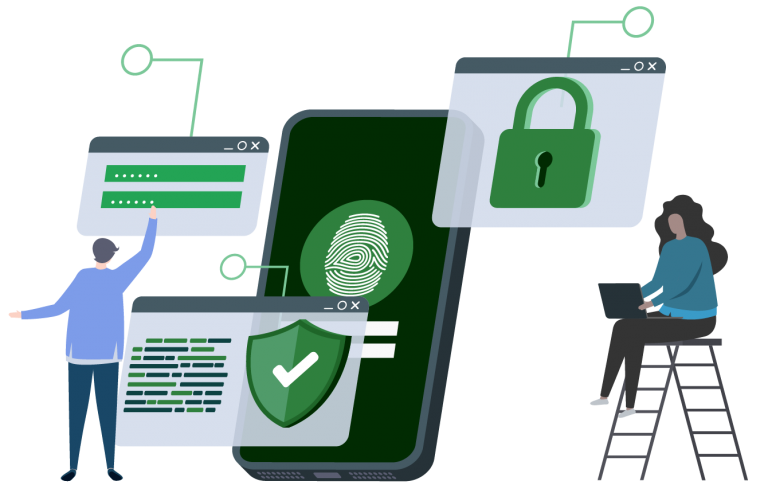
1. Strong Authentication System
Password Security in 2025:
81% of WordPress vulnerabilities happen because of weak or stolen passwords. Don’t be a statistic.
Requirements:
- Minimum 16 characters (updated from 12 in 2024)
- Mix of uppercase, lowercase, numbers, and special symbols
- Unique for each platform (no reuse)
- Password managers: 1Password, Bitwarden, or LastPass
- Change every 90 days for admin accounts
Never use: ❌ Personal information (birthdays, names)
❌ Dictionary words
❌ Sequential patterns (123456, abcdef)
❌ Default “admin” username
Two-Factor Authentication (2FA) – Non-Negotiable:
With hackers breaking into WordPress admin accounts within seconds using brute force, 2FA is mandatory.
Best 2FA Solutions:
- Wordfence 2FA (WordPress plugin)
- Google Authenticator (mobile app)
- Authy (multi-device sync)
- Hardware keys (YubiKey for maximum security)
Setup Process:
- Install 2FA plugin (Wordfence or iThemes Security)
- Scan QR code with authenticator app
- Save backup codes securely
- Test login process before closing session
- Enable for all admin-level users
2. Software Updates: Your First Defense Line
Outdated sites are the root cause of 61% of attacks. Yet only 38% of WordPress websites run the latest software version.
Update Strategy:
WordPress Core:
- Enable automatic minor updates (already default)
- Test major updates on staging site first
- Update within 48 hours of release
- Current version: 6.7 (as of November 2025)
Plugins & Themes:
- 827 plugins and themes were reported as abandoned in 2024
- Audit monthly for abandoned plugins
- Delete unused plugins immediately (even if deactivated)
- Premium themes receive updates 3x faster than free ones
- Set up automatic plugin updates for trusted developers
PHP Version:
- Only 1.1% of WordPress websites are running the latest PHP version (8.0+)
- Current recommended: PHP 8.2 or 8.3
- Check compatibility before upgrading
- Old versions have critical security holes
Quick Update Checklist:
□ Backup before updating (always!)
□ Update plugins first
□ Update themes second
□ Update WordPress core last
□ Test site functionality
□ Check for broken elements
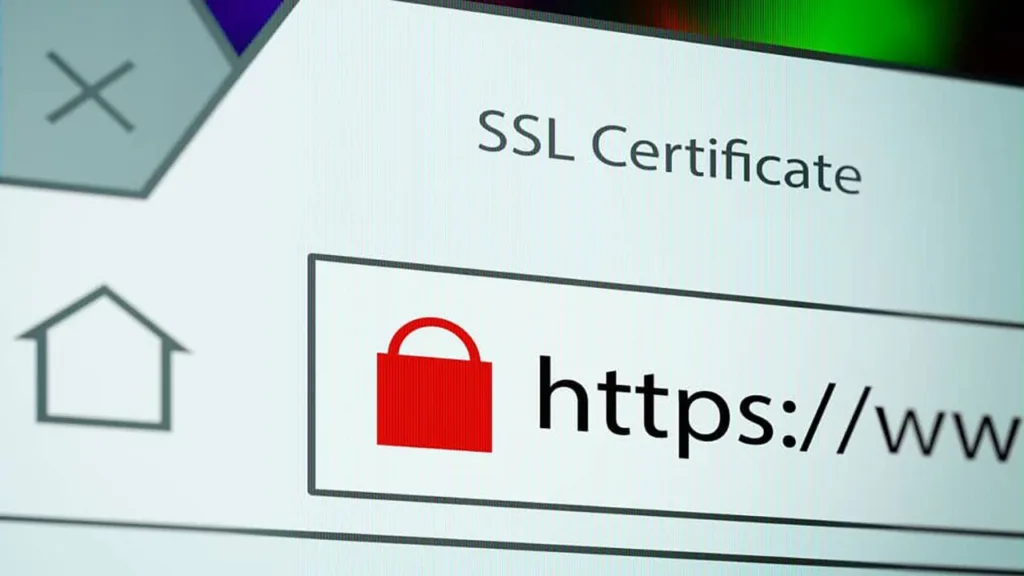
3. SSL Certificate – The Security Foundation
SSL (Secure Sockets Layer) is mandatory, not optional, in 2025.
Why SSL Matters: ✅ Encrypts data transmission (HTTPS)
✅ Protects login credentials
✅ Boosts Google rankings (confirmed ranking factor)
✅ Builds visitor trust (trust badges increase conversions by 42%)
✅ Required for payment processing
✅ Prevents “Not Secure” browser warnings
SSL Implementation:
Free SSL Options:
- Let’s Encrypt (most hosting providers)
- Cloudflare SSL (free plan)
- SSL For Free (manual installation)
Installation Steps (cPanel):
- Login to cPanel
- Navigate to SSL/TLS section
- Choose “Let’s Encrypt SSL”
- Select domain
- Click “Install”
- Set up 301 redirects (HTTP → HTTPS)
Force HTTPS (add to .htaccess):
RewriteEngine On
RewriteCond %{HTTPS} off
RewriteRule ^(.*)$ https://%{HTTP_HOST}%{REQUEST_URI} [L,R=301]
Verification:
- Check for padlock icon in browser
- Test on: https://www.ssllabs.com/ssltest/
- Aim for A+ rating
4. Web Application Firewall (WAF) – Your Security Guard
Wordfence blocks over 330 million malicious attempts daily. A WAF is your 24/7 security guard.
Top WAF Solutions 2025:
Cloudflare (Free + Paid)
- DDoS protection
- Bot filtering
- Rate limiting
- CDN included
- Best for: Sites of all sizes
Sucuri Firewall ($199.99/year)
- Website firewall
- Malware cleanup included
- 99.99% uptime guarantee
- Best for: E-commerce sites
Wordfence (Free + Premium $119/year)
- Real-time threat intelligence
- Built-in malware scanner
- Login security features
- Best for: WordPress-specific protection
What WAF Protects Against:
- DDoS attacks (Distributed Denial of Service)
- SQL injection attempts
- XSS (Cross-Site Scripting) attacks
- Brute force login attempts
- Zero-day exploits
- Malicious bots and scrapers
5. CAPTCHA Protection Against Bots
Websites without Google CAPTCHAs are unsafe against automated brute force attacks.
Implementation Options:
Google reCAPTCHA v3 (Invisible)
- No user interaction required
- Risk-based analysis
- Free for most sites
hCaptcha
- Privacy-focused alternative
- Pays website owners
- GDPR compliant
Setup Process:
- Register at Google reCAPTCHA
- Get site key and secret key
- Install CAPTCHA plugin (reCAPTCHA by BestWebSoft)
- Enable on login, registration, and comment forms
6. Malware Scanning & Removal
Recommended Security Plugins for 2025:
| Plugin | Free Features | Premium Cost | Best For |
|---|---|---|---|
| Wordfence | Firewall, Malware scan, 2FA | $119/year | All-in-one protection |
| Sucuri Security | Security hardening, Monitoring | $199.99/year | Professional sites |
| iThemes Security | 30+ security measures | $99/year | User-friendly option |
| All In One WP Security | Comprehensive free features | Free only | Budget-conscious users |
Scanning Schedule:
- Daily automatic scans (set during low-traffic hours)
- Real-time file monitoring
- Immediate email alerts for threats
- Quarantine suspicious files automatically
Advanced Security Measures for Maximum Protection
1. Principle of Least Privilege (PoLP)
Only grant users the minimum access they need.
WordPress User Roles Hierarchy:
- Super Admin – Complete control (only 1-2 people)
- Administrator – Site management (trusted team only)
- Editor – Content management
- Author – Own posts only
- Contributor – Submit for review
- Subscriber – Profile access only
Best Practices:
- Regular user audit (quarterly)
- Remove inactive accounts after 90 days
- Use role management plugins (User Role Editor)
- Never share admin credentials
2. Disable File Editing in WordPress Dashboard
Why: WordPress allows editing themes/plugins from dashboard – huge security risk if account is compromised.
How to Disable:
// Add to wp-config.php file (above "That's all, stop editing!")
define('DISALLOW_FILE_EDIT', true);
Additional Protection:
// Also disable file updates
define('DISALLOW_FILE_MODS', true);
3. Change WordPress Database Prefix
Default wp_ prefix makes SQL injection attacks easier.
For New Sites:
- Choose during installation:
xyz123_or random string
For Existing Sites:
- Backup database first (critical!)
- Install “Brozzme DB Prefix & Tools Addon” plugin
- Follow wizard to change prefix
- Verify site functionality
- Update wp-config.php if needed
4. Limit Login Attempts
Without limits: Unlimited brute force attempts possible
With limits: Attackers blocked after failed attempts
Recommended Plugin: Limit Login Attempts Reloaded
Optimal Settings:
- Allow 4 login attempts
- Lock out for 20 minutes after failed attempts
- Increase to 24 hours after 4 lockouts
- Enable email notifications
- Whitelist your IP address
5. Hide WordPress Version & Login Page
Hide WordPress Version:
// Add to functions.php
remove_action('wp_head', 'wp_generator');

// Remove version from scripts and styles
function remove_version_scripts_styles($src) {
    if (strpos($src, 'ver=')) {
        $src = remove_query_arg('ver', $src);
    }
    return $src;
}
add_filter('style_loader_src', 'remove_version_scripts_styles', 9999);
add_filter('script_loader_src', 'remove_version_scripts_styles', 9999);
Change Login URL:
- Default: yoursite.com/wp-admin (everyone knows this!)
- Use “WPS Hide Login” plugin
- Change to: yoursite.com/secure-login-2025
- Never share login URL publicly
6. Secure wp-config.php File
Most sensitive file in WordPress installation.
Protection Steps:
1. Change File Permissions:
chmod 440 wp-config.php
# or
chmod 400 wp-config.php
2. Deny Access via .htaccess:
<files wp-config.php>
order allow,deny
deny from all
</files>
3. Add Security Keys:
- Generate at: https://api.wordpress.org/secret-key/1.1/salt/
- Replace existing keys in wp-config.php
- Change every 6 months
7. Activity Logging & Monitoring
Know exactly what happens on your site.
Best Activity Log Plugins:
WP Activity Log (Free + Premium)
- Tracks all user actions
- Login/logout monitoring
- Content changes tracking
- Plugin/theme modifications
Setup Alerts For:
- New user registrations
- Admin login attempts
- Plugin installations/deletions
- Theme changes
- Failed login attempts (5+)
- File modifications
8. Security Headers Implementation
Add security headers to protect against various attacks.
Add to .htaccess:
<IfModule mod_headers.c>
    Header set X-XSS-Protection "1; mode=block"
    Header set X-Content-Type-Options "nosniff"
    Header set X-Frame-Options "SAMEORIGIN"
    Header set Referrer-Policy "strict-origin-when-cross-origin"
    Header set Permissions-Policy "geolocation=(), microphone=(), camera=()"
</IfModule>
Test Headers:
- Use: https://securityheaders.com/
- Target: A+ rating
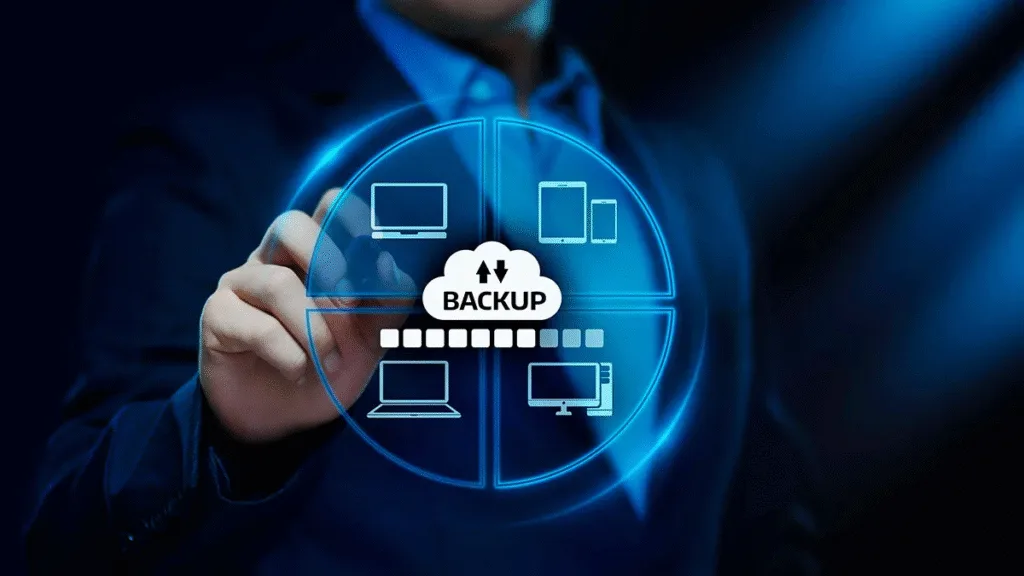
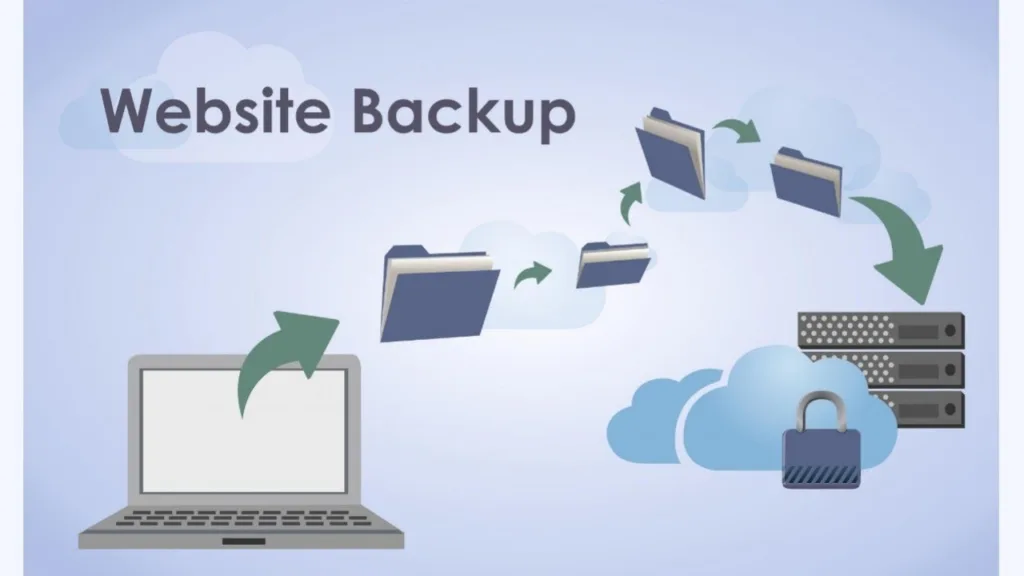
Complete Blog Backup Strategy Guide
Security measures prevent attacks; backups save you when prevention fails. Nearly half of sites that experienced breaches still don’t have a recovery plan.
Why Backups are Critical
Real-World Scenarios:
Case Study: Fashion Blogger Sarah Problem: Plugin conflict crashed site during Black Friday sale
Impact: Lost $15,000 in revenue
Solution: Restored from backup taken 6 hours earlier
Outcome: Back online in 20 minutes, recovered 80% of potential sales
Case Study: Tech Blog Owner Mike Problem: Ransomware attack encrypted entire site
Impact: Attackers demanded $5,000
Solution: Had daily offsite backups
Outcome: Refused to pay, restored clean backup, cost: $0
Types of Backups You Need
1. Full Site Backup (Complete Snapshot)
- WordPress files (themes, plugins, uploads, core files)
- Database (posts, pages, comments, settings, users)
- Configuration files (.htaccess, wp-config.php, robots.txt)
When to use: Before major updates, monthly archives
2. Database-Only Backup (Content Focus)
- Faster than full backup
- Contains all posts, pages, and settings
- Doesn’t include uploaded files or themes
When to use: Daily quick backups
3. Incremental Backup (Changes Only)
- Only backs up files modified since last backup
- Saves storage space (60-80% less than full)
- Faster backup process
When to use: Continuous protection for active sites
Backup Frequency: Data-Driven Approach
Companies that handle security in-house are 22% more likely to have a recovery plan. Here’s your schedule:
| Site Type | Content Updates | Backup Frequency | Retention Period |
|---|---|---|---|
| Active Blog | Multiple posts daily | Real-time or hourly | 30 days rolling |
| Regular Blog | 3-5 posts weekly | Daily | 30 days + monthly archive |
| Occasional Blog | Weekly updates | Weekly | 60 days + quarterly archive |
| Static/Portfolio | Monthly changes | Monthly | 90 days + yearly archive |
| E-commerce | Continuous orders | Real-time | 90 days rolling |
Golden Rule: You should never lose more data than you can afford to recreate.
Understanding RTO and RPO
Recovery Time Objective (RTO): How long can your site be down?
- E-commerce: 15-30 minutes
- Business blog: 2-4 hours
- Personal blog: 24 hours
Recovery Point Objective (RPO): How much data can you afford to lose?
- E-commerce: 5-15 minutes
- Active blog: 1-4 hours
- Static site: 24 hours
Your backup frequency should match your RPO.
Real-Time vs Scheduled Backups: The Complete Comparison
Real-time backups capture data in real time with zero Recovery Point Objective (RPO), making them ideal for dynamic environments that require immediate recovery.
Real-Time Backup (Continuous Data Protection)
True continuous data protection has no backup schedules. When data is written to disk, it is also asynchronously written to a second location.
How It Works:
- Monitors file system continuously
- Backs up changes within seconds/minutes
- Allows the user to restore data to any point in time
Advantages: ✅ Zero to minimal data loss (RPO: seconds to minutes)
✅ Every time you save a change, it’s backed up automatically
✅ Instant recovery points
✅ Perfect for critical business data
✅ Protects against sudden failures
Disadvantages: ❌ Higher resource usage (bandwidth, storage)
❌ More expensive ($200-500/year for WordPress)
❌ If you accidentally save a corrupted file, the bad version gets backed up right away
❌ Requires version history to roll back errors
Best For:
- E-commerce stores (live transactions)
- Membership sites (user data changes)
- High-traffic blogs (frequent content updates)
- Multi-author sites (constant changes)
WordPress Plugins Offering Real-Time Backups:
- BlogVault ($89/year) – Incremental real-time
- Jetpack Backup ($99.95/year) – True real-time
- ManageWP ($2/month per site) – Near real-time
Scheduled Backup (Traditional Approach)
Scheduled backups happen at set times, like once a day or week.
How It Works:
- Runs at predetermined times (daily, weekly)
- Creates complete snapshot of site
- Stores in designated location
Advantages: ✅ Lower cost (many free options)
✅ Less resource-intensive
✅ Easy to implement with simple, accessible scheduling features
✅ Works across long distances
✅ Predictable backup windows
Disadvantages: ❌ If backup is done once a day and a failure occurs, you could lose up to 24 hours of work
❌ Vulnerability window between backups
❌ May miss critical changes
❌ Fixed recovery points only
Best For:
- Personal blogs (infrequent updates)
- Static websites
- Low-traffic sites
- Budget-conscious bloggers
- Sites with predictable content schedules
Recommended Scheduled Backup Plugins:
- UpdraftPlus (Free) – Most popular
- BackupBuddy ($80/year) – Full-featured
- Duplicator (Free) – Migration focus
Decision Matrix: Which Backup Type?
Choose Real-Time If:
- Revenue depends on site uptime
- You update content multiple times daily
- You run an online store
- Data loss would be catastrophic
- Budget allows $100-500/year
Choose Scheduled If:
- Personal or hobby blog
- Limited budget (<$50/year)
- Infrequent content updates
- Can tolerate 12-24 hours data loss
- Simple setup preferred
Hybrid Approach (Recommended):
- Real-time: Database changes (content, orders, comments)
- Scheduled (daily): Full site backups (files, themes, plugins)
- Scheduled (weekly): Complete archives stored offsite
This provides best of both worlds at moderate cost.
Best Backup Methods & Tools (2025 Edition)
Method 1: Automated Plugin Backups (Recommended)
UpdraftPlus – The Complete Solution
Free Version:
- Manual and scheduled backups
- Cloud storage (Google Drive, Dropbox, OneDrive, S3)
- One-click restore
- Database encryption
Premium ($70/year):
- Incremental backups (save bandwidth)
- Multiple backup schedules
- Automatic backups before updates
- Migration tools
- Priority support
Setup Tutorial:
1. Install UpdraftPlus from WordPress directory
2. Go to Settings > UpdraftPlus Backups
3. Click "Settings" tab
4. Choose backup schedule:
   - Files: Weekly
   - Database: Daily
5. Select remote storage (Google Drive recommended)
6. Authenticate with Google
7. Set backup retention (30 days)
8. Save changes
9. Run manual backup to test
10. Verify files in Google Drive
BackupBuddy – Premium Powerhouse
Price: $80/year (1 site)
Key Features:
- Real-time database backups
- Malware scanning included
- Stash cloud storage (10GB)
- Site migration tools
- Live chat support
Best for: Professional bloggers, agencies
BlogVault – Incremental Backup Specialist
Price: $89/year
Key Features:
- Organizations using Duplicator can assign a backup file as a disaster recovery point with a launcher file to restore with just a few clicks
- Incremental backups (90-day archive)
- Staging environment included
- Automatic malware scanning
- One-click staging site
Best for: High-traffic sites, developers
Jetpack Backup
Price: $9.95/month
Key Features:
- Real-time backups
- 30-day activity log
- One-click restore
- Download backup archives
- Automatic threat detection
Best for: WordPress.com users, bloggers wanting simplicity
Method 2: Manual Backup via cPanel (Emergency Backup)
When to use: Plugin fails, emergency backup needed, learning purposes
Complete Step-by-Step Process:
Part 1: Backup Files
- Login to cPanel (provided by hosting)
- Scroll to “Files” section
- Click “File Manager”
- Navigate to
public_htmlfolder - Click
public_htmlto select - Click “Compress” at top toolbar
- Choose “Zip Archive”
- Name:
backup-[date].zip - Click “Compress Files”
- Wait for completion
- Right-click compressed file
- Select “Download”
- Save to computer/external drive
Part 2: Backup Database
- In cPanel, find “Databases” section
- Click “phpMyAdmin”
- Select your WordPress database (left sidebar)
- Click “Export” tab (top menu)
- Select “Quick” export method
- Format: SQL
- Click “Go”
- File downloads automatically
- Save as:
database-backup-[date].sql
Part 3: Download Configuration Files
- Back to File Manager
- Find these files in
public_html:- wp-config.php
- .htaccess
- robots.txt
- Download each file individually
Storage: Keep all files together in dated folder
Frequency: Weekly for active sites, monthly for static sites
Pros: ✅ Complete control ✅ No plugin dependency ✅ Free ✅ Works when dashboard inaccessible
Cons: ❌ Time-consuming (30-45 minutes) ❌ Manual process (easy to forget) ❌ Requires technical knowledge ❌ No automation
Method 3: Hosting Provider Backups (Secondary Protection)
Most quality hosts provide automatic backups, but never rely solely on these.
Reliable Hosts with Strong Backup Features:
SiteGround
- Daily automated backups
- 30 days retention
- Free restore (1x monthly)
- On-demand backup tool
Kinsta
- Daily automatic backups
- 14-day retention (Premium: 20-30 days)
- One-click restore
- Downloadable backups
WP Engine
- Daily automated backups
- 60 days retention
- Staging environments included
- One-click restore
Cloudways
- Automatic daily backups
- On-demand backups
- Easy restoration
- Server snapshots
Important Limitations:
- Retention periods are limited
- Restore might have downtime
- May charge for additional restores
- Backup access during billing disputes
- Not portable to other hosts
Best Practice: Use hosting backups as tertiary backup, not primary.
Where to Store Backups Safely
Remote storage like Google Drive, OneDrive, and Dropbox provides extra security.
Follow the 3-2-1 Rule:
- 3 copies of your data (1 original + 2 backups)
- 2 different storage mediums (cloud + local)
- 1 offsite location (cloud storage)
Cloud Storage Comparison:
| Service | Free Storage | Paid Plans | Integration | Security |
|---|---|---|---|---|
| Google Drive | 15GB | $1.99/100GB | Excellent | AES 256-bit |
| Dropbox | 2GB | $11.99/2TB | Excellent | AES 256-bit |
| OneDrive | 5GB | $1.99/100GB | Good | AES 256-bit |
| Amazon S3 | Free tier | Pay-as-you-go | Advanced | Military-grade |
| pCloud | 10GB | $49.99/500GB lifetime | Good | 256-bit encryption |
Local Storage Options:
- External hard drive (2TB+): $60-100
- USB flash drive (128GB+): $20-30
- NAS (Network Attached Storage): $200-500
- Dedicated backup drive (rotate weekly)
Storage Best Practices: ✅ Encrypt backups before uploading
✅ Use strong passwords for cloud accounts
✅ Enable 2FA on cloud storage
✅ Test restoration from each location quarterly
✅ Rotate physical drives (keep offsite)
✅ Label backups clearly with dates
✅ Never store ONLY on your hosting server
Backup Testing & Verification (Critical But Often Skipped)
Nearly half of sites that experienced breaches don’t have a recovery plan. Having backups is useless if they don’t work.
Why Test Backups?
Common Backup Failures:
- Corrupted files (incomplete backup process)
- Missing database tables
- Broken file permissions
- Incompatible PHP versions
- Missing plugin dependencies
- Incorrect file paths
Real Scenario: “I had 6 months of backups. When my site crashed, NONE of them worked. Database was incomplete in all of them. I lost everything.” – Reddit user, r/WordPress
Backup Testing Schedule
| Frequency | What to Test | Method |
|---|---|---|
| Monthly | Restore on staging site | Full restoration test |
| Quarterly | Restore from cloud storage | Download + local restore |
| Before major updates | Current backup integrity | File verification |
| After plugin changes | Backup completeness | Size/file count check |
| Annually | Disaster recovery procedure | Complete workflow test |
How to Test Backups Properly
Method 1: Staging Site Restoration (Recommended)
Many hosts provide free staging environments:
Using SiteGround Staging:
- Login to Site Tools
- Click “Staging” section
- Create new staging site
- Copy production site to staging
- Download backup file
- Use UpdraftPlus “Migrate/Clone” tab
- Upload backup
- Click “Restore”
- Verify staging site works
- Check: posts, images, forms, plugins
Method 2: Local Installation (XAMPP/Local by Flywheel)
Using Local by Flywheel (Free):
- Download Local (localwp.com)
- Install on your computer
- Create new local site
- Extract backup ZIP
- Copy files to local site folder
- Import database via phpMyAdmin
- Update wp-config.php (database credentials)
- Update URLs using Search Replace plugin
- Test site functionality
- Document any issues
Method 3: Backup Integrity Check (Quick Verification)
Without full restore:
- Download backup file
- Check file size (should match previous backups)
- Extract ZIP file locally
- Verify folder structure:
- wp-content (should have themes, plugins, uploads)
- wp-admin folder
- wp-includes folder
- Open database SQL file
- Verify tables exist (search for “CREATE TABLE”)
- Check file count matches site structure
Backup Health Checklist:
□ Backup file size appropriate (not 0KB or abnormally small)
□ Database file contains all tables (wp_posts, wp_users, etc.)
□ Media folder present with images
□ Theme files complete
□ Plugin files complete
□ wp-config.php included
□ .htaccess included
□ All backup components accessible
□ No error logs in backup directory
□ Backup created successfully (check email notifications)
Automation of Backup Verification
UpdraftPlus Premium Feature:
- Automatic backup verification
- Email reports on backup integrity
- Alerts for failed backups
BlogVault:
- Automatic test restore to staging
- Weekly verification reports
- Integrity monitoring
How to Restore Blog from Backup (Step-by-Step)
When disaster strikes, every second counts. Here’s your complete restoration guide.
Pre-Restoration Checklist
Before starting restoration:
□ Identify what went wrong (hack, crash, deletion?)
□ Determine which backup to use (date/time)
□ Verify backup integrity (test extraction)
□ Document current site state (screenshots if accessible)
□ Notify stakeholders about downtime
□ Have hosting credentials ready
□ Have database credentials ready
□ Clear browser cache
□ Disable caching plugins temporarily
Restoration Method 1: UpdraftPlus Plugin (Easiest)
Scenario: Dashboard is accessible
Step-by-Step Process:
- Login to WordPress Dashboard
- Go to yourdomain.com/wp-admin
- Enter admin credentials
- Navigate to UpdraftPlus
- Dashboard → Settings → UpdraftPlus Backups
- Click “Existing Backups” tab
- Select Backup
- Choose backup date (before problem occurred)
- Verify backup is complete (all components showing)
- Choose Components to Restore
- ☑ Plugins
- ☑ Themes
- ☑ Uploads
- ☑ Others (wp-content)
- ☑ Database
- ☐ More files (only if needed)
- Start Restoration
- Click “Restore” button
- Confirm restoration prompt
- Wait for process (5-30 minutes depending on size)
- DO NOT close browser window
- Post-Restoration Actions
- Clear site cache
- Test homepage loading
- Check admin dashboard access
- Verify recent posts visible
- Test login functionality
- Check contact forms
- Verify images loading
- Final Verification
- Browse 5-10 different pages
- Test internal links
- Check mobile responsiveness
- Run security scan
- Update passwords (if security breach)
Time Required: 20-45 minutes
Restoration Method 2: Manual Restoration via FTP
Scenario: Dashboard inaccessible or severely compromised
Required Tools:
- FTP client (FileZilla recommended)
- phpMyAdmin access
- Backup files (ZIP and SQL)
- Text editor (Notepad++ or Sublime)
Complete Process:
Phase 1: Prepare for Restoration
- Download Backup Files
- Locate backup ZIP file
- Locate database SQL file
- Extract ZIP locally
- Connect to Server
- Open FileZilla
- Enter hostname (from hosting panel)
- Username and password
- Port: 21 (FTP) or 22 (SFTP)
- Click “Quickconnect”
Phase 2: Delete Compromised Files
- Backup Current State (Optional)
- Download current public_html folder
- Save as “compromised-site-backup”
- For investigation purposes
- Delete Infected/Broken Files
- Navigate to public_html
- Select all WordPress files EXCEPT:
- wp-content/uploads (preserve media)
- wp-config.php (if database info is correct)
- Right-click → Delete
- Confirm deletion
Phase 3: Upload Clean Files
- Upload WordPress Files
- Navigate to extracted backup folder on local computer
- Select all files from backup
- Drag to public_html in FileZilla
- Choose “Overwrite” if prompted
- Wait for upload (10-60 minutes)
- Monitor progress in FileZilla
- Verify File Permissions
- Folders: 755
- Files: 644
- wp-config.php: 440 or 400
- Right-click → File Permissions to change
Phase 4: Restore Database
- Access phpMyAdmin
- Login to cPanel
- Find “Databases” section
- Click “phpMyAdmin”
- Drop Existing Tables (if corrupted)
- Select WordPress database (left sidebar)
- Check “Select All” (bottom)
- Dropdown: “Drop”
- Confirm action
- Import Backup Database
- Click “Import” tab
- Click “Choose File”
- Select backup SQL file
- Scroll down
- Click “Go”
- Wait for import (1-10 minutes)
- Success message should appear
- Verify Database Tables
- Check left sidebar
- Should see tables: wp_posts, wp_users, wp_options, etc.
- Click wp_posts → Browse
- Verify posts visible
Phase 5: Configure WordPress
- Update wp-config.php
- Download wp-config.php from server
- Open in text editor
- Verify database name, username, password, host
- Should match current hosting database credentials
- If backup from different host, update these:
define('DB_NAME', 'current_database_name');define('DB_USER', 'current_username');define('DB_PASSWORD', 'current_password');define('DB_HOST', 'localhost'); - Save file
- Re-upload to server (overwrite)
- Update Site URLs (if domain changed)
- In phpMyAdmin
- Select wp_options table
- Find “siteurl” row → Click “Edit”
- Update to: https://yourdomain.com
- Find “home” row → Click “Edit”
- Update to: https://yourdomain.com
- Save changes
Phase 6: Test and Verify
- Access Your Site
- Visit yourdomain.com
- Clear browser cache first
- Homepage should load
- Login to Dashboard
- Go to yourdomain.com/wp-admin
- Use credentials from backup timeframe
- Should access successfully
- Run Complete Verification
- Check Pages → All Pages (verify content)
- Check Posts → All Posts (verify posts)
- Check Media Library (verify images)
- Check Appearance → Themes (verify active theme)
- Check Plugins (verify installed plugins)
- Test front-end functionality
- Security Check After Restoration
- Change all passwords immediately
- Run malware scan (Wordfence)
- Check user accounts (remove suspicious)
- Review recent activity logs
- Update security keys in wp-config.php
Time Required: 1-3 hours (depending on site size)
Restoration Method 3: Hosting Provider Restore
Scenario: Quick restore from hosting backup
SiteGround Example:
- Login to Site Tools
- Navigate to “Backups”
- Choose backup date
- Select what to restore:
- Files only
- Database only
- Both
- Click “Restore”
- Confirm action
- Wait 5-20 minutes
- Verify site functionality
Kinsta Example:
- Login to MyKinsta dashboard
- Select site
- Click “Backups” tab
- Choose backup (hourly, daily, or manual)
- Click “Restore to Staging” (test first)
- Verify staging site
- If good: “Restore to Live”
- Confirm restoration
Time Required: 15-30 minutes
Post-Restoration Critical Actions
After successful restoration, immediately:
Security Hardening:
□ Change ALL passwords (WordPress, hosting, FTP, database)
□ Regenerate WordPress security keys
□ Scan for malware (Wordfence deep scan)
□ Update all plugins/themes/core
□ Review user accounts (delete suspicious)
□ Enable 2FA for all admin accounts
□ Check file permissions
□ Review .htaccess for malicious code
□ Clear all caches
□ Submit site for Google re-review (if blacklisted)
Functional Testing:
□ Test contact forms
□ Test e-commerce checkout (if applicable)
□ Verify email sending works
□ Check SSL certificate active
□ Test mobile responsiveness
□ Verify sitemap accessible
□ Check robots.txt
□ Test search functionality
□ Verify comments system
□ Check widget areas
□ Test navigation menus
Documentation:
□ Document what went wrong
□ Note restoration time taken
□ Record data loss (if any)
□ Update recovery plan
□ Schedule security audit
□ Plan prevention measures
Content Protection Strategies
Beyond backups, protect your intellectual property.
1. Copyright Protection
Essential Steps:
- Add copyright notice in footer:
© 2025 YourBlog.com. All Rights Reserved. - Display DMCA badge (get from dmca.com)
- Register important content with copyright office
- Use Creative Commons license if sharing allowed
WordPress Plugins:
- WP Content Copy Protection – Disable right-click, text selection
- Prevent Content Theft – RSS feed protection
- DMCA Badge – Official DMCA protection badge
RSS Feed Protection: Add to functions.php:
function add_copyright_to_rss($content) {
    $content .= '<p><small>© ' . get_bloginfo('name') . ' - <a href="' . get_permalink() . '">' . get_the_title() . '</a></small></p>';
    return $content;
}
add_filter('the_excerpt_rss', 'add_copyright_to_rss');
add_filter('the_content_feed', 'add_copyright_to_rss');
2. Image Protection
Watermarking:
- Use Image Watermark plugin
- Add subtle watermark to all images
- Include website URL in watermark
Disable Hotlinking: Add to .htaccess:
RewriteEngine on
RewriteCond %{HTTP_REFERER} !^$
RewriteCond %{HTTP_REFERER} !^http(s)?://(www\.)?yourdomain.com [NC]
RewriteCond %{HTTP_REFERER} !^http(s)?://(www\.)?google.com [NC]
RewriteRule \.(jpg|jpeg|png|gif|webp)$ - [NC,F,L]
3. Database Optimization & Maintenance
Regular cleanup improves security and performance.
Monthly Maintenance Tasks:
- Delete spam comments
- Remove post revisions (limit to 5)
- Clean up transients
- Optimize database tables
- Delete unused media files
WP-Optimize Plugin (Free):
- Automatic scheduled cleanups
- Database optimization
- Image compression
- Cache management
Manual Database Optimization:
-- In phpMyAdmin, run:
OPTIMIZE TABLE wp_posts;
OPTIMIZE TABLE wp_postmeta;
OPTIMIZE TABLE wp_comments;
OPTIMIZE TABLE wp_options;
Limit Post Revisions: Add to wp-config.php:
define('WP_POST_REVISIONS', 5);
Common Security & Backup Mistakes to Avoid
Learning from others’ mistakes is cheaper than learning from your own.
Critical Mistakes
1. Single Backup Location ❌ Wrong: All backups on same server
✅ Right: 3-2-1 rule (3 copies, 2 mediums, 1 offsite)
2. Never Testing Backups ❌ Wrong: “I have backups” (but never tested)
✅ Right: Monthly restoration tests on staging
3. Storing Backups on Server Only ❌ Wrong: Backups in /backup folder on same server
✅ Right: Cloud storage + external drive
4. Deleting Old Backups Too Soon ❌ Wrong: Only keeping last 7 days
✅ Right: 30-day rolling + monthly archives
5. Weak Passwords ❌ Wrong: “password123”, “yourname2025”
✅ Right: “Kp9#mL2@vN5$wQ8!” (16+ random characters)
6. Ignoring Plugin Updates ❌ Wrong: “If it ain’t broke, don’t update”
✅ Right: Update within 48 hours of release
7. Too Many Plugins ❌ Wrong: 50+ plugins installed
✅ Right: 15-25 essential plugins, rest deleted
8. Using Nulled/Pirated Themes ❌ Wrong: Free premium theme from random site
✅ Right: Official themes from WordPress.org or legitimate marketplaces
9. No Security Plugin ❌ Wrong: “My site is too small to hack”
✅ Right: Wordfence or Sucuri on every site
10. Sharing Admin Login ❌ Wrong: Same admin account for multiple people
✅ Right: Separate accounts with appropriate roles
11. Ignoring Security Warnings ❌ Wrong: Dismissing Google Security Warning
✅ Right: Immediate investigation and cleanup
12. No Activity Monitoring ❌ Wrong: No idea what happens on site
✅ Right: Activity log plugin tracking all changes
Hosting Selection for Better Security
Your hosting provider is your security foundation.
Essential Security Features to Look For
Must-Have Features: ✅ Free SSL certificates (Let’s Encrypt)
✅ Daily automated backups (30+ days retention)
✅ Automatic malware scanning
✅ DDoS protection
✅ Web Application Firewall (WAF)
✅ 24/7 security monitoring
✅ PHP 8.0+ support
✅ Server-level security patches
✅ Isolated account security
✅ SSH/SFTP access
Nice-to-Have Features:
- Staging environment
- Free CDN (Cloudflare integration)
- WordPress-specific optimization
- Automatic updates
- Free site migrations
Recommended Secure Hosting Providers 2025
SiteGround – $14.99/month
- Proactive security monitoring
- Daily backups (free restore)
- Anti-bot AI
- Free SSL & CDN
- WordPress auto-updates
- Best for: Bloggers wanting managed security
Kinsta – $35/month
- Google Cloud infrastructure
- Daily automatic backups (14-30 days)
- Free hack fix guarantee
- Built-in CDN
- Staging environments
- Best for: High-traffic professional blogs
WP Engine – $20/month
- Managed WordPress security
- Real-time threat detection
- Daily backups (60 days)
- Staging sites included
- Automatic core updates
- Best for: Business blogs, agencies
Cloudways – $11/month
- Server-level firewalls
- Advanced security features
- Automated backups
- Free SSL
- 24/7 monitoring
- Best for: Tech-savvy bloggers wanting control
Avoid These Hosting Types: ❌ Cheap shared hosting without security features
❌ Hosting without SSL included
❌ Providers with poor support reviews
❌ Services without backup options
❌ Hosts with frequent downtime issues
Legal Compliance & Privacy (2025 Requirements)
GDPR Compliance (EU Users)
Required elements:
- Privacy policy page (WP GDPR Compliance plugin)
- Cookie consent banner (Cookie Notice plugin)
- Data export option for users
- Data deletion requests handling
- Clear data collection disclosure
- Consent before email collection
Essential Plugins:
- Complianz GDPR/CCPA Cookie Consent
- GDPR Cookie Compliance
CCPA Compliance (California)
Requirements:
- “Do Not Sell My Personal Information” link
- Privacy policy with data categories
- Opt-out mechanism
- Consumer rights disclosure
Terms of Service
Include:
- Acceptable use policy
- Copyright policy
- User responsibilities
- Limitation of liability
- Dispute resolution
- Content licensing
Use: TermsFeed.com to generate policies
Monitoring & Alert Systems
Real-time monitoring saves sites before total failure.
Essential Monitoring Tools
1. Google Search Console (Free)
- Security issues detection
- Manual action notifications
- Coverage errors
- Core Web Vitals monitoring
Setup:
- Visit search.google.com/search-console
- Add property (your domain)
- Verify ownership (HTML file or DNS)
- Enable email notifications
2. Uptime Monitoring
UptimeRobot (Free for 50 monitors)
- Checks site every 5 minutes
- Email/SMS alerts on downtime
- Status page creation
- Response time tracking
Pingdom (Paid $10/month)
- Advanced monitoring
- Performance insights
- Transaction monitoring
- RUM (Real User Monitoring)
3. WordPress Security Monitoring
Jetpack (Free + Paid)
- Downtime monitoring
- Security scanning
- Brute force protection
- Activity log
ManageWP ($1/month per site)
- Multiple site dashboard
- Uptime monitoring
- Backup management
- Security checks
Alert Configuration
Critical Alerts (Immediate):
- Site down
- Malware detected
- Failed backups
- Unauthorized admin access
- Plugin/theme changes
- Unusual traffic spikes
Warning Alerts (24-hour response):
- Failed login attempts (10+)
- PHP errors increasing
- Slow page load times
- SSL certificate expiring (30 days)
- Disk space low
Info Alerts (Weekly digest):
- Successful logins
- Plugin updates available
- Content published
- Comment submissions
Emergency Recovery Plan Document
Prepare this BEFORE disaster strikes.
Recovery Plan Template
Document Contents:
Section 1: Access Information
Hosting Provider: [Name]
Control Panel URL: [URL]
Username: [Username]
Password: [Store in password manager]
Support Phone: [Number]
Support Email: [Email]

Domain Registrar: [Name]
Account URL: [URL]
Username: [Username]
Password: [Store in password manager]

WordPress Admin:
URL: [yourdomain.com/wp-admin]
Username: [Username]
Password: [Store in password manager]

FTP/SFTP Access:
Host: [ftp.yourdomain.com]
Username: [Username]
Password: [Store in password manager]
Port: [21 or 22]

Database Access:
phpMyAdmin URL: [URL]
Database Name: [db_name]
Username: [db_user]
Password: [Store in password manager]
Section 2: Backup Locations
Primary Backup:
- Plugin: UpdraftPlus
- Storage: Google Drive
- Folder: [Folder path]
- Frequency: Daily (3 AM)
- Retention: 30 days

Secondary Backup:
- Method: Manual cPanel
- Storage: External Drive
- Location: [Physical location]
- Frequency: Weekly (Sundays)
- Retention: 90 days

Tertiary Backup:
- Provider: Hosting auto-backup
- Retention: 30 days
- Access: Via cPanel > Backups
Section 3: Emergency Contacts
Primary Admin: [Name]
Phone: [Number]
Email: [Email]

Technical Support: [Name/Company]
Phone: [Number]
Email: [Email]
Availability: [Hours]

Hosting Support: [Provider]
Priority Support: [Yes/No]
Phone: [Number]
Section 4: Recovery Procedures
Scenario 1: Site Hacked
1. Take site offline (maintenance mode)
2. Run Wordfence deep scan
3. Restore from clean backup (pre-hack date)
4. Change all passwords
5. Update security keys
6. Scan again
7. Bring site back online
8. Submit to Google for review

Scenario 2: Database Corruption
1. Try database repair: wp-admin/maint/repair.php
2. If fails, restore database from backup
3. Import via phpMyAdmin
4. Test site functionality
5. Run WP-Optimize

Scenario 3: Complete Site Loss
1. Contact hosting support
2. Restore full site backup via UpdraftPlus
3. If plugin inaccessible, use manual FTP method
4. Verify all functionality
5. Document what caused loss
6. Implement prevention measures
Section 5: Verification Checklist
After any restoration:
□ Homepage loads correctly
□ Admin dashboard accessible
□ All posts/pages visible
□ Images loading properly
□ Forms submitting correctly
□ SSL certificate active
□ Plugins functioning
□ Theme displaying correctly
□ Navigation working
□ Search functionality active
□ Comments system operational
□ Email sending working
□ Analytics tracking active
□ Security scan passed
Document Storage
Where to Keep Recovery Plan:
- Password manager (1Password, Bitwarden)
- Encrypted cloud storage (separate from backups)
- Printed copy in safe location
- Shared with trusted team member
- NOT on the website server
Conclusion: Your Complete Security Action Plan
Protecting your blog requires ongoing commitment, not one-time setup.
Immediate Actions (Do Today)
Hour 1: Critical Security
- Change admin password (16+ characters)
- Install Wordfence Security plugin
- Enable 2FA on admin account
- Check for plugin/theme updates
Hour 2: Backup Setup 5. Install UpdraftPlus 6. Connect to Google Drive 7. Schedule daily database backups 8. Schedule weekly full backups 9. Run first manual backup 10. Verify backup in Google Drive
Hour 3: Essential Hardening 11. Install SSL certificate 12. Force HTTPS redirect 13. Change login URL (WPS Hide Login) 14. Limit login attempts 15. Hide WordPress version
Monthly Security Checklist
First Monday of Month:
□ Run full security scan (Wordfence)
□ Review user accounts (delete inactive)
□ Check plugin updates
□ Review security logs
□ Test backup restoration on staging
□ Update passwords (admin accounts)
□ Check SSL certificate expiry date
□ Review activity logs
□ Monitor uptime reports
□ Check Google Search Console for issues
Quarterly Deep Dive
Every 3 Months:
□ Complete security audit
□ Test disaster recovery plan
□ Review hosting security features
□ Update recovery documentation
□ Audit installed plugins (remove unused)
□ Check file permissions
□ Review .htaccess security rules
□ Test all backup storage locations
□ Update security keys in wp-config.php
□ Professional security scan (Sucuri SiteCheck)
The Security Mindset
Remember these principles:
Prevention > Recovery
Spending 2 hours on security beats spending 20 hours recovering from a hack.
Backups are Insurance
You never think you need them until you desperately do.
Stay Updated
61% of hacks exploit outdated software. Always update.
Test Everything
Untested backups are as good as no backups.
Document Everything
When disaster strikes at 2 AM, documentation saves you.
Frequently Asked Questions (FAQs)
1. How often should I backup my WordPress blog?
For active blogs publishing daily content, implement daily automated backups for databases and weekly full-site backups. E-commerce sites need real-time or hourly backups due to transaction data. Less active blogs can schedule weekly backups with monthly full archives. The rule: never risk losing more data than you can afford to recreate. Based on industry data, organizations with daily backups recover 90% faster from security incidents.
2. What is the best free backup plugin for WordPress in 2025?
UpdraftPlus remains the most reliable free backup solution with over 3 million active installations. It offers automated scheduling, cloud storage integration (Google Drive, Dropbox, OneDrive, S3), one-click restore, and database encryption. Alternative free options include BackWPup for advanced users and Duplicator for migration-focused needs. However, for business-critical sites, premium solutions like BlogVault ($89/year) with real-time backups provide better protection.
3. Can I restore my blog if it gets completely hacked?
Yes, absolutely—if you have clean backups. The process: identify when the hack occurred, restore from a backup dated before the breach, change all passwords immediately, regenerate security keys, run comprehensive malware scans, and implement stronger security measures. On average, sites with proper backups recover within 2-4 hours. Without backups, recovery can take days or weeks and may require professional help costing $500-$5,000. This is why the 3-2-1 backup rule is critical.
4. Is cloud storage safe for blog backups?
Cloud storage like Google Drive, Dropbox, and Amazon S3 use military-grade AES 256-bit encryption and is highly secure. Organizations using AI security tools save an average of $1.88 million per data breach. Best practices: enable two-factor authentication on cloud accounts, encrypt backups before uploading using plugins like UpdraftPlus, use strong unique passwords, and maintain backups in multiple cloud locations. Never rely solely on one storage location—follow the 3-2-1 rule for maximum safety.
5. Do I need a premium backup plugin or is free enough?
Free plugins like UpdraftPlus suffice for personal blogs and small websites with daily traffic under 10,000 visitors. Upgrade to premium ($70-200/year) if you need: real-time backups (e-commerce, membership sites), incremental backups (save bandwidth on large sites), priority support (business-critical sites), malware scanning, or staging environments. Sites generating revenue should always invest in premium backup solutions—the cost is minimal compared to potential loss.
6. How do I know if my WordPress site has been hacked?
Warning signs include: unexpected redirects to suspicious sites, unfamiliar admin user accounts, files with recent modification dates you didn’t change, slow site performance, Google blacklist warnings, automatic spam content appearing, database errors, and unusual traffic spikes. Run Wordfence Security deep scan immediately if you suspect compromise. Google Search Console also alerts you to security issues. Prevention tip: enable activity logging with WP Activity Log plugin to monitor all site changes in real-time.
7. What is the 3-2-1 backup rule and why is it important?
The 3-2-1 rule is the industry-standard backup strategy: maintain 3 copies of your data (1 original + 2 backups), store them on 2 different storage types (example: cloud storage + external hard drive), with 1 copy offsite (cloud storage or different physical location). This protects against multiple failure scenarios: server crashes, natural disasters, ransomware attacks, and human error. Nearly half of sites that experienced breaches don’t have a recovery plan—don’t be one of them.
8. Should I use real-time or scheduled backups for my blog?
Use real-time backups if: you run an e-commerce store, publish multiple posts daily, have membership features with user-generated content, or cannot afford to lose more than 1 hour of data. Use scheduled daily backups if: you’re a casual blogger, have a limited budget (<$50/year), update content infrequently, or run a static portfolio site. Optimal approach: Hybrid strategy with real-time database backups (content changes) and daily scheduled full-site backups (files, themes, plugins). This balances protection and cost effectively.
9. How long does it take to restore a WordPress site from backup?
Restoration time varies by method: UpdraftPlus plugin restore takes 20-45 minutes for average sites (under 2GB), manual FTP/database restoration requires 1-3 hours depending on technical skill, and hosting provider restore typically completes in 15-30 minutes. Factors affecting speed: backup size, internet connection speed, server performance, and database complexity. Sites with real-time backups can recover within 10-15 minutes. Always test restoration on staging sites quarterly to ensure you can meet your Recovery Time Objective (RTO).
10. What security measures are most important in 2025?
Based on 2025 threat analysis, prioritize: Strong passwords + 2FA (prevents 81% of password-based attacks), regular software updates (stops 61% of exploits), Web Application Firewall (Wordfence blocks 330M+ attacks daily), SSL/HTTPS (encrypts data transmission), malware scanning (detects 98% of threats), limited login attempts (blocks brute force), and principle of least privilege (restricts user access). New in 2025: AI-powered threat detection and bcrypt password hashing provide enhanced protection. Implement all measures, not just one—security requires layered defense.
Final Thought
Your blog represents countless hours of work, creative energy, and business value. In 2025, with hackers using AI-powered attacks and vulnerabilities being discovered daily, protection isn’t optional—it’s essential.
The good news? You now have a complete blueprint for keeping your blog safe. Start with the immediate actions today, implement the monthly checklist, and build security into your blogging routine.
Remember: The best time to implement security was yesterday. The second-best time is right now.
Your blog is worth protecting. Take action today.